

Visualize
Backsplash visualizer for your own kitchen
To see a new backsplash, photograph the wall behind your counter, mark it, and name the tile, its layout, the grout color and how high it should go. Without a style, Interify changes only the backsplash and keeps the cabinets and counter as they were.
Backsplash wallGlossy white zellige tile, stacked layout, light gray grout, up to the uppers
Key facts
- Mark and describe
- Rectangle, lasso and marker tools outline the areas to change; each area gets its own note.
- Cost of a version
- 1 credit. Packs start at $9 for 30 credits, down to $0.16 a credit
- Time per version
- Usually about a minute
- Output
- HD results, up to 3072 px
How to do it in Interify
Photograph the backsplash wall square on
Stand square to the wall with the counter below and the uppers above in frame. A steep angle makes tile joints hard to rebuild cleanly.
Mark the wall between counter and uppers
Use the rectangle tool for the main stretch. If the backsplash wraps behind a cooktop or into a corner, mark each section as its own area.
Name the tile and the layout
Say the shape and size, then the layout: stacked, running bond, herringbone or vertical. The layout changes the look as much as the tile does.
Say the grout color and where the backsplash stops
Matching grout keeps it quiet, contrasting grout turns it into a grid. Then say whether it stops at the uppers, runs to the ceiling, or goes full height behind the hood.
Compare with the counter in the shot
A backsplash is judged against the counter and the cabinet color, so keep them in the frame and compare versions rather than looking at tile alone.
Notes you can copy
Each marked area carries its own note. Copy one of these and change the words that don't fit your room.
- Backsplash wall
- Glossy white zellige tile, stacked layout, light gray grout, up to the uppers
- Backsplash wall
- Classic white subway tile in a running bond with soft gray grout
- Backsplash wall
- Deep green gloss tile in a vertical stack, matching grout, to the ceiling
- Behind the cooktop
- Full-height slab of the same stone as the counter behind the hood only
- Backsplash wall
- Small hexagon matte tile in off-white with mid-gray grout
- Backsplash wall
- Terracotta handmade tile in a herringbone layout, matching grout
Photographing the room
The photo decides how much of the result looks like your room.
- Clear the counter and move the small appliances. Whatever sits against the wall hides the backsplash and stays in the result.
- Turn off the under-cabinet lights, which throw a strong gradient down the wall and confuse the tile color.
- Stand straight on rather than diagonally, so the grid of joints comes back regular.
- Include the counter edge and the underside of the uppers, so the backsplash starts and stops in the right places.
- Take a closer second shot of the run behind the cooktop if that is the part you care about.
Scale, then layout, then grout
Those three decisions make the backsplash. A large tile with matching grout almost disappears; small tiles with contrasting grout become a pattern. A herringbone or vertical stack takes a plain tile and makes it the feature.
All three are easy to write into a note and almost impossible to picture from a single tile in your hand, which is exactly what a preview is for.
How high should it go
Stopping at the uppers is standard and cheapest. Running to the ceiling where there are no uppers, or full height behind the hood, makes the wall read as one surface and is a common way to give a plain kitchen one deliberate moment.
Say where it stops in the note. Seeing both heights on your own wall usually settles it.
Gloss, matte and the life of a kitchen
Gloss bounces light, which helps a dark kitchen, and shows water marks and fingerprints. Matte is quieter and more forgiving. Textured and handmade tiles catch light beautifully and are harder to wipe behind a cooktop.
There is no right answer, only a trade between how it looks and how it cleans. Decide it deliberately rather than by accident.
Letting one surface be the loud one
If the counter has strong veining, a plain backsplash keeps the kitchen calm. If the counter is quiet, the backsplash can carry the pattern. Two patterned surfaces beside each other rarely sit well.
Mark the counter and the backsplash as separate areas and change one at a time. The pair is the thing you are choosing, not the tile.
Slab backsplashes
Running the counter material up the wall removes the grout lines entirely, which looks seamless and costs more. It also makes the stone's pattern much more prominent, because you are now seeing it vertically at eye level.
Preview it before paying for the extra material: the same stone that is handsome on a counter can be overwhelming on a wall.
What to expect
What a preview settles, and what it can't.
- Handmade tile varies piece to piece, and that variation is why people choose it. A preview shows the character, not the actual box of tile.
- It won't show outlets, switches or how a tile is cut around them, which is often where a layout goes wrong.
- Grout color on a screen is an approximation, and grout darkens slightly as it cures and ages.
- It won't tell you whether a porous tile needs sealing, or how easy a texture is to wipe behind a cooktop.
Examples
Made with Interify, each from one photo and the areas marked on it. Switch a card between the original and the result.
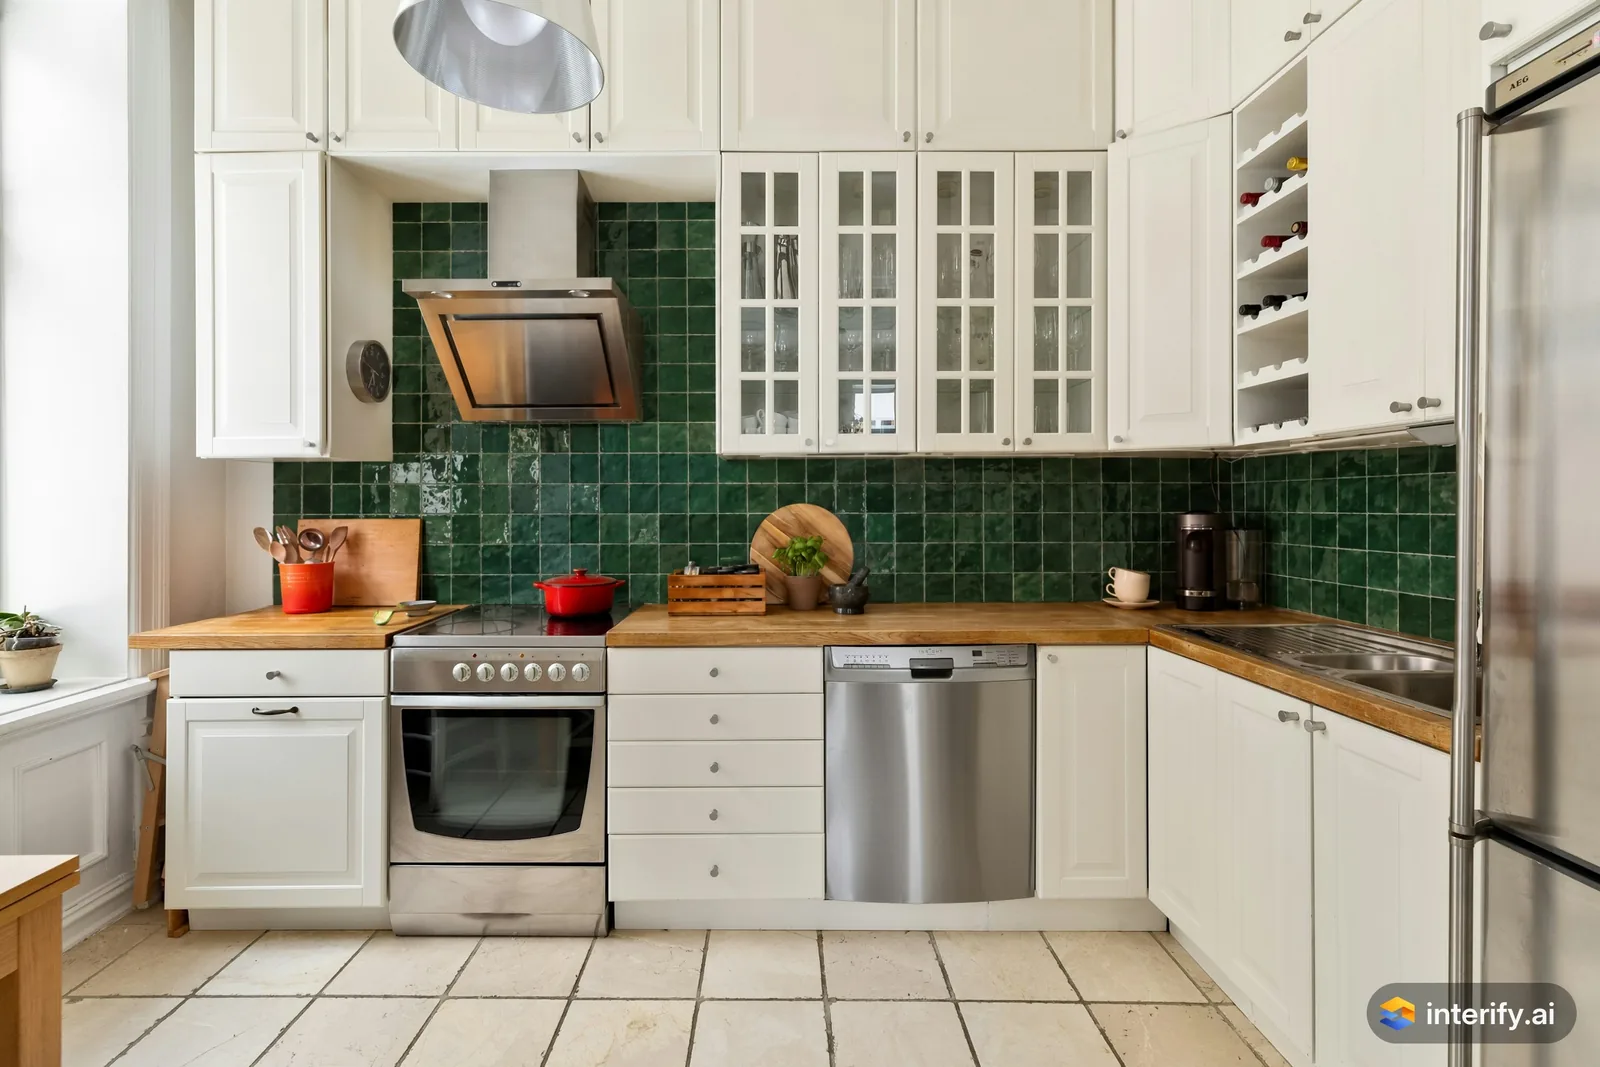
L-shaped kitchen: green zellige backsplash
Kitchen
- Deep green zellige tile backsplash
Made with Interify
Common questions
Can I see a new backsplash in my own kitchen?
Yes. Mark the wall behind the counter, set the action to Replace material and name the tile, the layout, the grout color and the height.
Can I change the backsplash without touching the counter?
Yes. Mark the backsplash alone, with no style, and the counter, cabinets and appliances stay as they were.
Can I try different grout colors?
Yes. Run one version per grout color with the same tile in the note, then compare them. Grout is the cheapest way to change how a tile reads.
Can I preview tile running to the ceiling?
Yes. Mark the full height of the wall you mean and say in the note that the tile runs to the ceiling.
Read on
- KitchenA kitchen remodel visualizer that works on your own photo: mark the cabinets, counters or backsplash, say what each should become, and compare versions.
- BathroomSee a bathroom remodel in your own photo: mark the tile, vanity or fixtures, describe the finish you want, and compare versions side by side.
- CountertopsA countertop visualizer that uses your photo: mark the counter, name the stone, edge and finish, and see it against your cabinets and backsplash.
- Kitchen cabinetsSee your kitchen cabinets in another color or door style: mark the doors in your photo, name the color, finish and hardware, and compare versions.
- How it worksThe whole walkthrough, from the photo to the share link.
- ExamplesRooms before and after, every one made with Interify.
See it in your own room
The sample room needs no account. Your own photo starts with 3 credits free and no card.