

How it works
Change one part of your room, and keep the rest
You upload a photo of the room as it is, draw around the parts you want changed, write what each one should become, and generate. Without a style, everything you leave unmarked stays as it was.
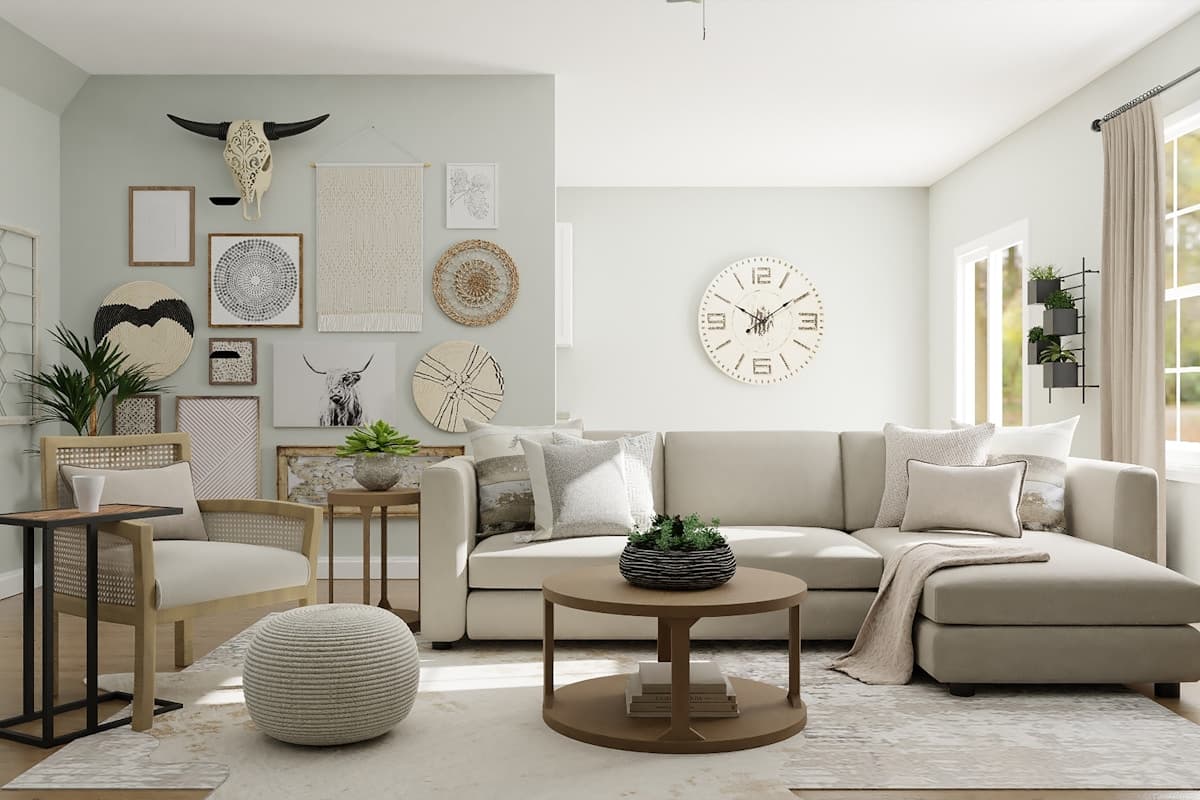
- Area 1Green velvet sofa
- Area 2Light oak floor
The four steps
Every version of every room goes through the same four.
Upload a photo
Take a photo of your room on your phone, or upload one you already have.
Mark what should change
Draw around each area with the rectangle, lasso or marker tool, and write a note saying what it should become.
Pick a style (optional)
Choose one of 20 interior styles, or write an instruction for the whole room.
Generate and compare
Get a photorealistic version of your room. Usually about a minute. Compare it with the original, then refine it, try again or share it.
Key facts
- Free to start
- 3 credits on signup, no card needed
- Cost of a version
- 1 credit. Packs start at $9 for 30 credits, down to $0.16 a credit
- Time per version
- Usually about a minute
- Output
- HD results, up to 3072 px
- Credits
- Never expire. A failed version's credit is refunded automatically
Step 1
Upload a photo of the room
A phone photo of the room as it is today is the whole input. There is nothing to measure, scan or model.
Interify works on the photograph you give it, so the photograph decides how good the preview can be. A clear, level shot of a tidy room in even light gives the model the walls, the floor and the light it needs to put a change in context.
The photo is uploaded straight to storage from your browser, turned the right way up if your phone recorded it sideways, and kept as you sent it. Versions are made at up to the size in the facts above, so a photo larger than that comes back a little smaller than your original. Only you can see either one unless you share a link.
How to photograph the room
- Stand in a corner and get two walls and the floor in frame. A wall shot flat-on gives the model nothing to place the change in.
- Hold the phone level, at about chest height. Tilting up stretches the ceiling and leans the walls in.
- Shoot in daylight with the lamps off, or at night with them on. Mixing daylight and lamplight gives one room two colors.
- Clear the surface you want changed. A sofa under a pile of coats is a pile of coats to the model too.
- Keep people and pets out of the frame.
- Landscape for a wall or a floor; portrait only when the thing you're changing is tall.
Not sure whether a photo is good enough? Check it in your browser — it reads the resolution, framing, light and sharpness and says what a result would inherit. The photo isn’t uploaded, and you don’t need an account.
Step 2
Mark what should change
Draw around each part you want changed and write what it should become. Without a style, everything you leave unmarked stays as it was.
Marking is the whole idea. Instead of asking for a new room and hoping yours survives, you point at the wall, the floor or the sofa, and say what that one thing should be. Each area gets its own outline, its own number and its own note.
Each area also carries an action, so the note is read the right way: change color, replace material, add item, remove item, restyle, or custom when none of those fit. If a description won't carry it, attach a reference photo to the area and the model is shown the material or the piece you mean.
The three tools
Rectangle
Drag a box. Best for flat, four-cornered things: a wall, a window, a floor, a countertop.
Lasso
Draw freehand and let go; the loop closes itself. Best for anything with an outline of its own, like a sofa or a rug.
Marker
Drop a pin and write the note. Best for a small object you'd rather point at than trace, like a lamp or a handle.
Notes that work
Describe what the area should become, not what is there now. These are the shape of note to aim for.
- Wall
- “Matte sage green paint, white trim kept”
- Floor
- “Wide light oak boards, matte finish, laid lengthways”
- Sofa
- “Dark green velvet three-seater with tapered wooden legs”
- Kitchen cabinets
- “Navy shaker fronts with brushed brass handles”
- Ceiling light
- “Rattan dome pendant, warm bulb”
- Rug
- “Remove the rug and leave the floor bare”
Step 3
Pick a style, or write an instruction
A style restyles the whole room. Marked areas still follow their notes. This step is optional: marks alone are a complete request.
Without a style, only the marked areas change, and the rest of the photo stays as it was. With a style, the whole room is restyled in it, and each marked area still becomes what its note says.
If none of the styles is the room in your head, the whole-room instruction box takes free text instead: name the materials, the palette and the mood yourself. A version uses one style, and the instruction can go with it or stand on its own.
Step 4
Generate and wait
One version costs one credit. Usually about a minute, and you can leave the page while it runs.
Generating sends the photo, your outlines and your notes together. Marks without a style come back composited over your original, so the parts you didn't ask about stay as they were rather than becoming the model's idea of them. A style, or an instruction on its own, remakes the whole photograph, keeping the room's walls, windows and light.
You don't have to watch it. The version appears in the project's history when it's done, and a version that fails has its credit returned automatically, without asking.
After the first version
Keep going from the result
A first version is a draft. Four actions take it further without starting over, and every version is kept.
Nothing is overwritten. Each version sits in the project's history with the one it came from, so a take you don't like costs a credit and nothing else, and you can always go back to the one you preferred.
Try again
The same request, run again for a different take. The first Try again of each version is free.
Tweak
Change the style or the instruction on a result and run it again from the same photo and marks.
Refine
Brush over the one part that came out wrong and regenerate only that, keeping the rest of the result.
Use as base
Make a result the photo the next change starts from, so changes stack instead of competing.
When it's right
Compare, download and share
Put the result beside the original under one divider, take the image, or send a link that opens without an account.
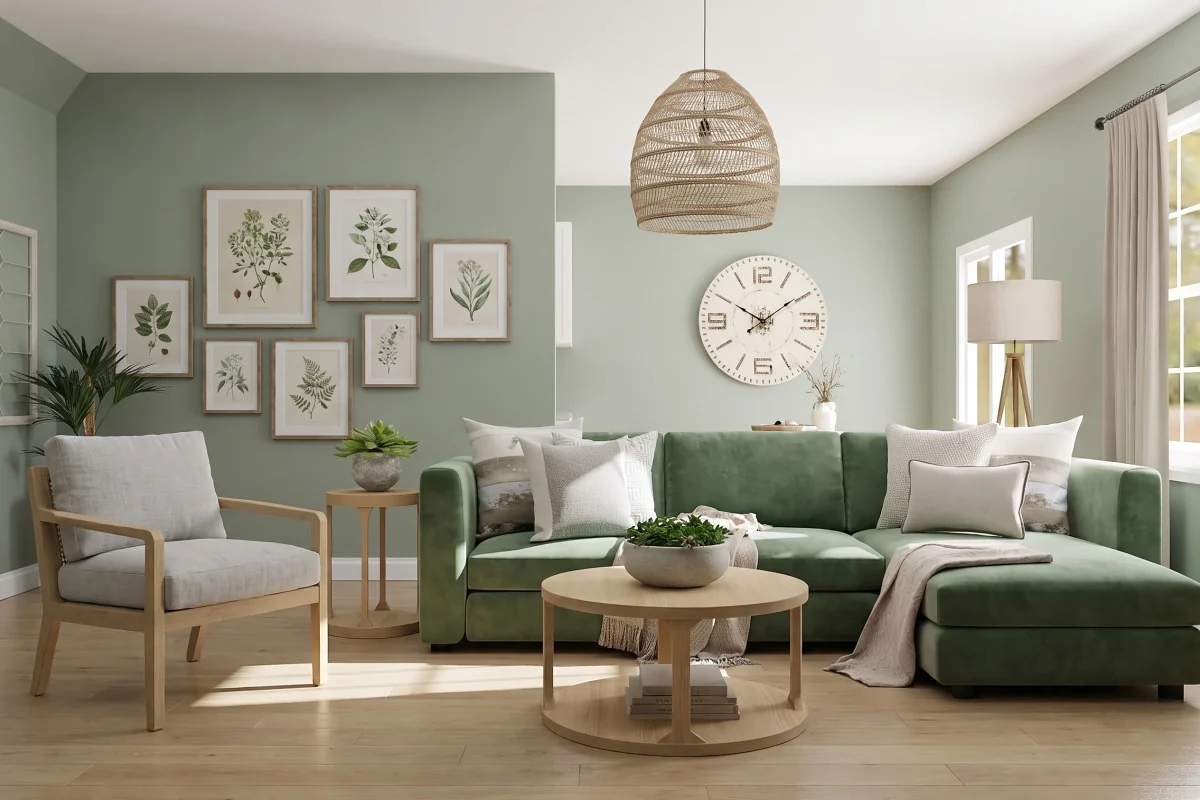
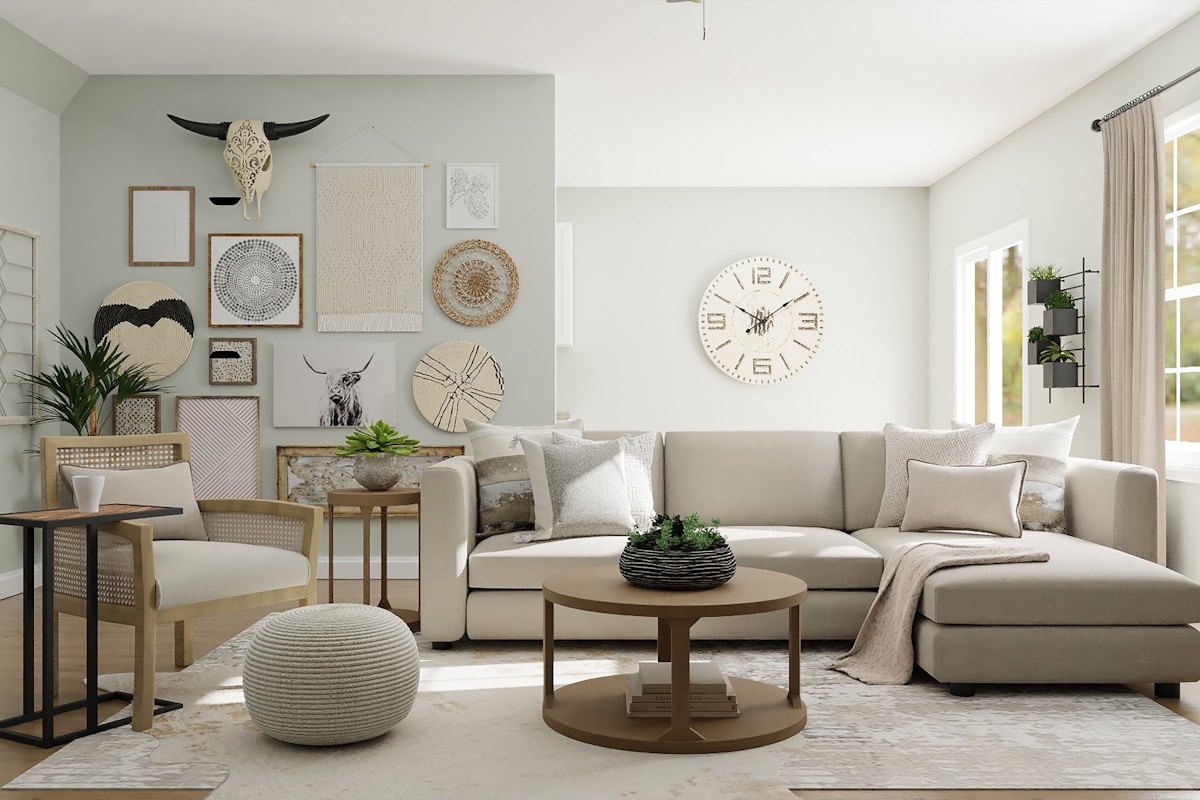
The comparison is the point of the whole thing: the room you have and the room you're considering, in the same frame, under a divider you drag. It reads in one gesture, which is what makes it worth sending to someone else.
A share link opens a page with that slider on it and nothing else of yours. You choose whether the original is shown at all, and you can revoke the link whenever you want.
What it doesn't do
Worth knowing before you spend a credit on it.
- 4K output. Results are HD, up to 3072 px on the long edge.
- Several styles in one run. Each version uses one style, with an optional instruction beside it.
- Editing your own photo without an account. The sample room at /try needs none.
- Floor plans, 3D models, measurements or cost estimates. Interify makes photographs of a change, not construction documents.
Questions about the flow
Do I have to draw accurately?
Roughly is enough. The outline tells the model which part of the photo to work on, and the result is blended back into the room, so a line a few pixels off doesn't show. Drawing across a neighboring surface does, so keep the outline inside the thing you mean.
How long does a version take?
Usually about a minute. You can leave the page; the version appears in the project's history when it's ready.
Can I change several things at once?
Yes. Mark as many areas as the photo needs and give each one its own note. They all go in the same run and come back in the same version.
What if the result isn't right?
Try again runs the same request for a different take, and the first Try again of each version is free. Tweak changes the style or the instruction. Refine redoes just the part you brush over. The version you started from is kept either way.
What happens if a version fails?
Its credit is returned automatically. You'll see what went wrong on the version itself, and nothing is charged twice for the same attempt.
Do I need an account to try it?
Not to see how it works: the sample room is open to everyone and shows pre-made results. Editing a photo of your own needs an account, which starts with free credits and no card.
Read on
- Every featureWhat Interify can do, one page each.
- Mark and describeThe three tools and what to write in a note.
- RefineFix one part of a version without starting over.
- ExamplesBefore and afters made with Interify.
- Room photo checkerCheck a photo in your browser before you upload it.
- Try the sample roomSee the whole flow without an account.
See it on a room you know
Start with the sample room, or upload a photo with 3 credits free. No card needed.