

Visualize
Flooring visualizer: see new floors in your room
To see new flooring in your own room, photograph the floor with the walls meeting it, mark the floor, and describe the material, tone, plank width and finish. Without a style, Interify replaces only the floor and keeps the furniture and walls as they were.
- FloorWide white oak planks, matte finish, running toward the window
Key facts
- Mark and describe
- Rectangle, lasso and marker tools outline the areas to change; each area gets its own note.
- Refine
- Brush over one part of a result to regenerate just that part.
- Cost of a version
- 1 credit. Packs start at $9 for 30 credits, down to $0.16 a credit
- Compare and share
- Compare versions side by side, download them, and share a link with a before/after slider that opens without an account.
How to do it in Interify
Get the whole floor in frame
Stand in the doorway or a corner so the floor runs away from you and meets the walls in the shot. The junction tells the model where the floor stops.
Mark the floor with the rectangle or lasso
The rectangle is quicker for an open floor; the lasso is better when furniture and rugs interrupt it. Follow the edges of what you can actually see.
Describe the material in four parts
Name the material, the tone, the plank or tile size, and the finish. For wood also say the direction: planks usually run toward the main light or along the longest wall.
Attach a reference photo if you have one
If you have a photo of the sample you are holding, attach it to the floor area as a reference, which gets the preview close to it.
Refine the edges if they come back wrong
Thresholds, baseboard and the line behind furniture are the fiddly parts. Brush over the strip that looks off and run Refine on it alone.
Notes you can copy
Each marked area carries its own note. Copy one of these and change the words that don't fit your room.
- Floor
- Wide white oak planks, matte finish, running toward the window
- Floor
- Herringbone oak in a mid-brown tone, satin finish, narrow blocks
- Floor
- Large-format matte porcelain tile in warm gray, narrow matching grout
- Floor
- Luxury vinyl plank in a pale gray-brown with a light wood grain
- Floor
- Plain wool carpet in a mid-gray with a low pile, no pattern
- Floor and rug
- Keep the floor as it is and add a large flatweave rug in muted terracotta
Photographing the room
The photo decides how much of the result looks like your room.
- Shoot in daylight. Floor color is strongly affected by the light, and warm bulbs push a cool floor warm.
- Keep the camera at chest height and upright. Pointing down at the floor makes the perspective hard to rebuild.
- Include the line where the floor meets the baseboard. Without it, a new floor can bleed up the wall.
- Move small rugs out of the shot if you plan to replace the whole floor.
- Take one shot along the length of the room, since plank direction is most visible down the long view.
What the common materials actually mean
Solid wood is a single solid board, can be sanded repeatedly and moves with humidity. Engineered wood is a real wood layer over plywood, which is more stable and works over radiant floor heating. Vinyl plank is waterproof and quiet and has gotten much better at looking like wood. Tile is the most durable and the coldest; carpet is the warmest and the hardest to keep clean.
A preview is good at the look of each. The rest of the decision, moisture, heating, noise and wear, comes from the specification, not the photograph.
Plank width, tone and how big the room reads
Wide planks show more of the grain and fewer joints, which tends to calm a small floor rather than shrink it. Narrow boards and busy patterns add visual activity. A mid-tone hides dust and scratches better than very dark or very pale floors.
These are tendencies rather than rules, and they are exactly the kind of thing worth seeing at full scale in your own room before ordering.
Direction, and why it matters more than people expect
Planks are usually laid toward the main source of light or along the longest wall, which makes the room read longer and hides the joints in daylight. Across the room instead, the boards become stripes.
Direction costs nothing to change on paper and is permanent once laid, so it belongs in the note: say which way the boards should run.
Matching a floor to walls and cabinets
The common difficulty is undertone. A floor with a pink or orange undertone fights a cool gray wall, and a yellow-toned oak can make a warm white look dirty. Matching exactly is harder than contrasting clearly.
Mark the floor and the wall as two areas in the same version so you judge the pair together. That is the comparison the store can't give you.
One floor through, or a change at the door
Running one floor through connected rooms makes a home feel larger and avoids thresholds. Changing material at a doorway marks the rooms as separate and lets you put tile where there is water.
Preview both from the same doorway shot. Seeing the threshold in place usually settles which you prefer.
What to expect
What a preview settles, and what it can't.
- A preview shows the look, not the product. Wood varies board to board, and tile varies batch to batch, so always see a sample in your room.
- It won't tell you how much flooring to order, how to handle thresholds, or whether your subfloor is suitable.
- It can't judge underfoot feel, warmth, sound or how a surface wears, which is often what decides between materials.
- It is not a measurement or a quote. An installer still needs to measure the room.
Examples
Made with Interify, each from one photo and the areas marked on it. Switch a card between the original and the result.
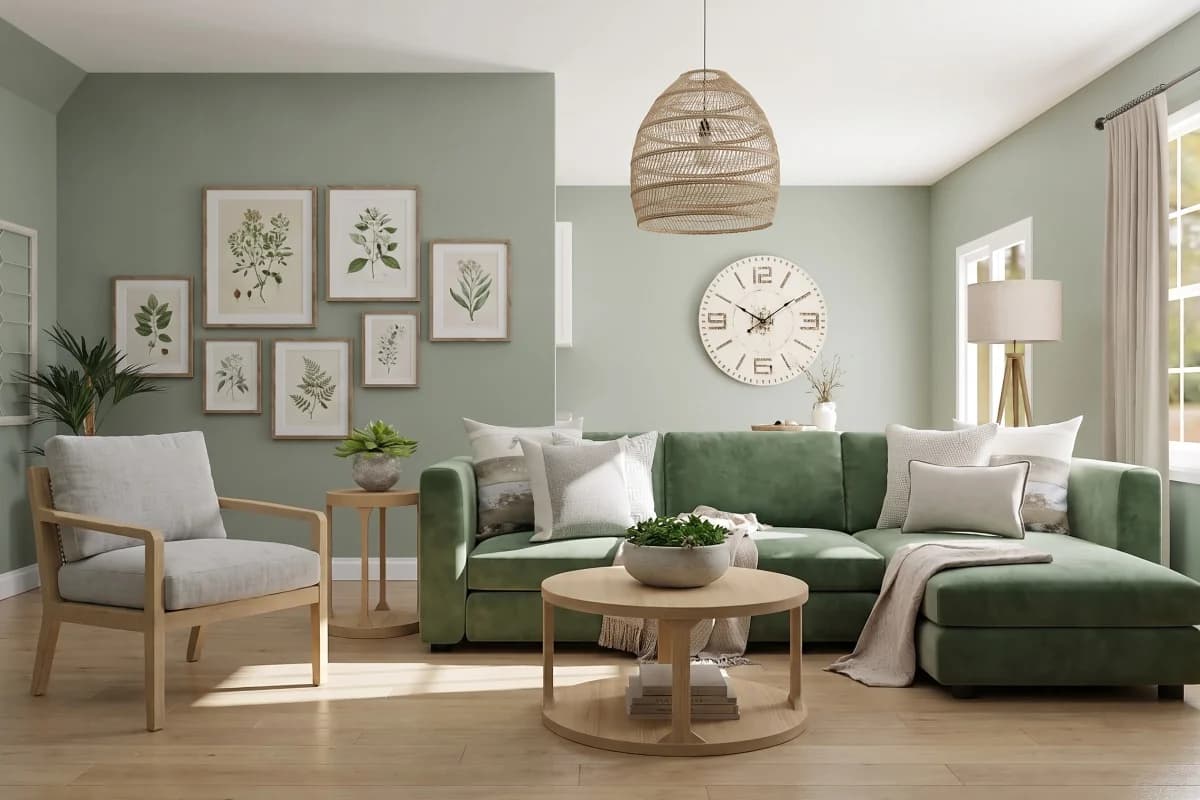
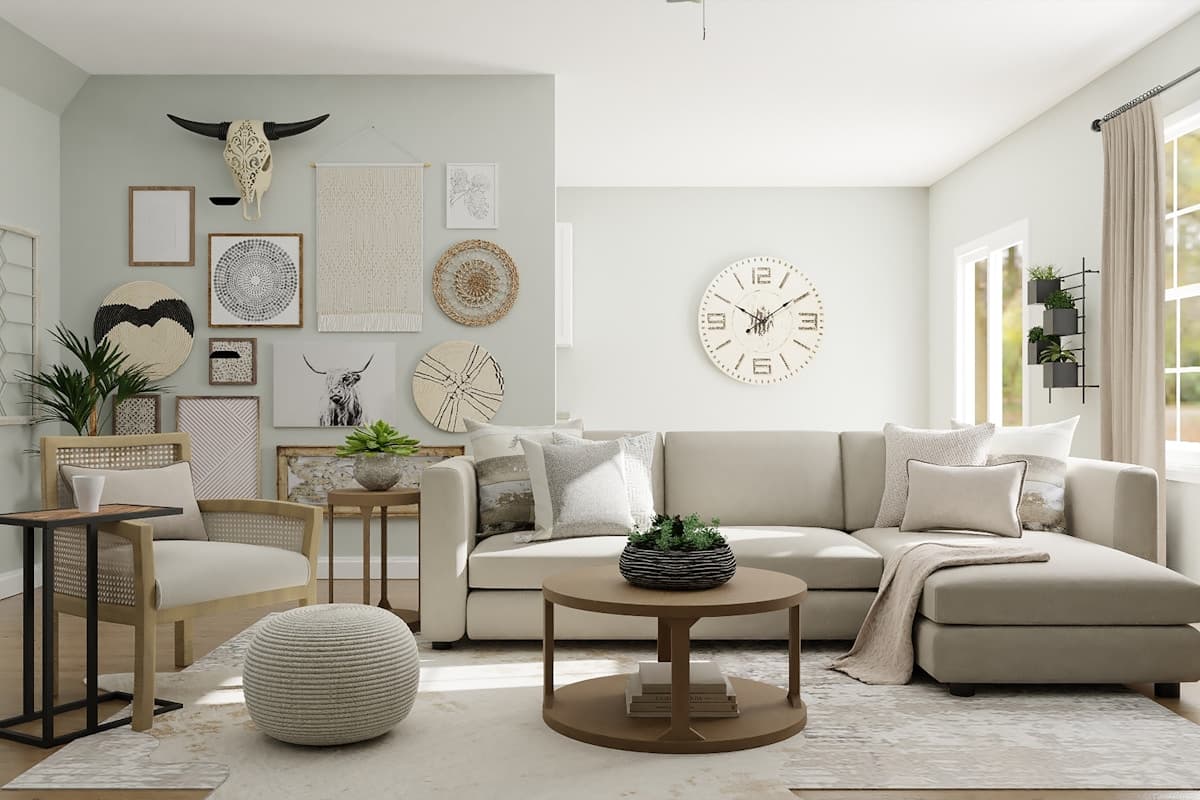
Scandinavian living room
Living room · Scandinavian
- Green velvet sofa
- Light oak floor
Made with Interify 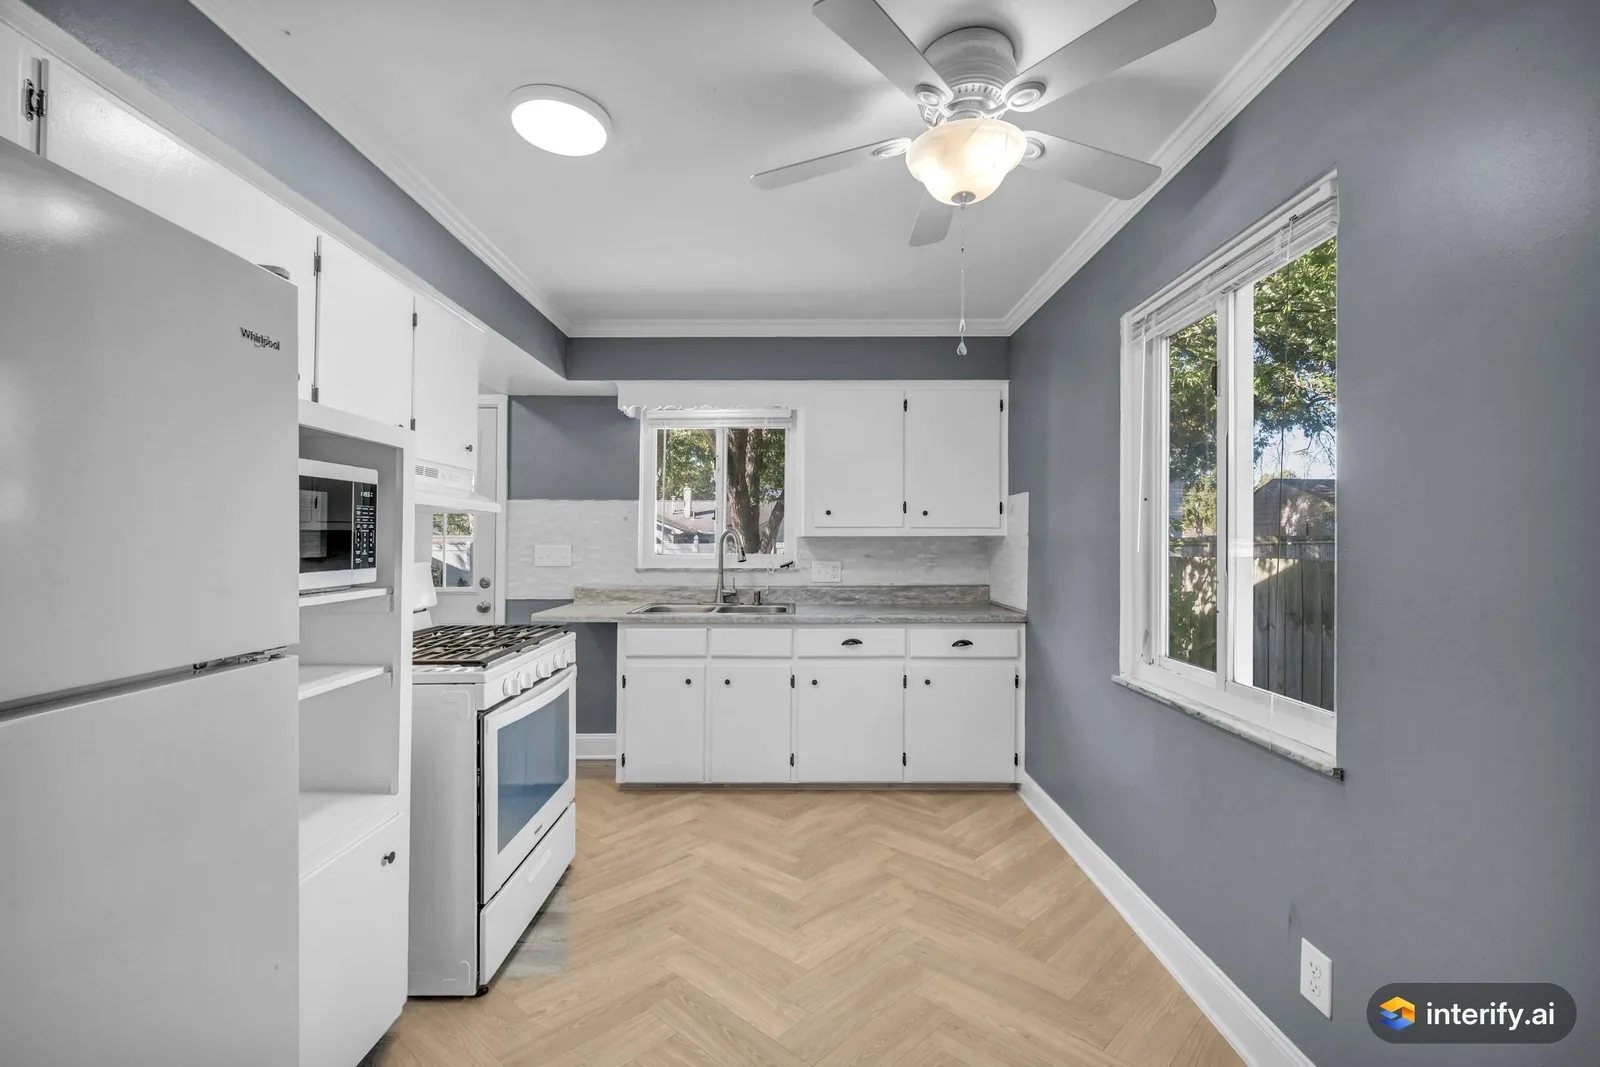
Galley kitchen: herringbone oak floor
Kitchen
- Light oak herringbone wood floor
Made with Interify 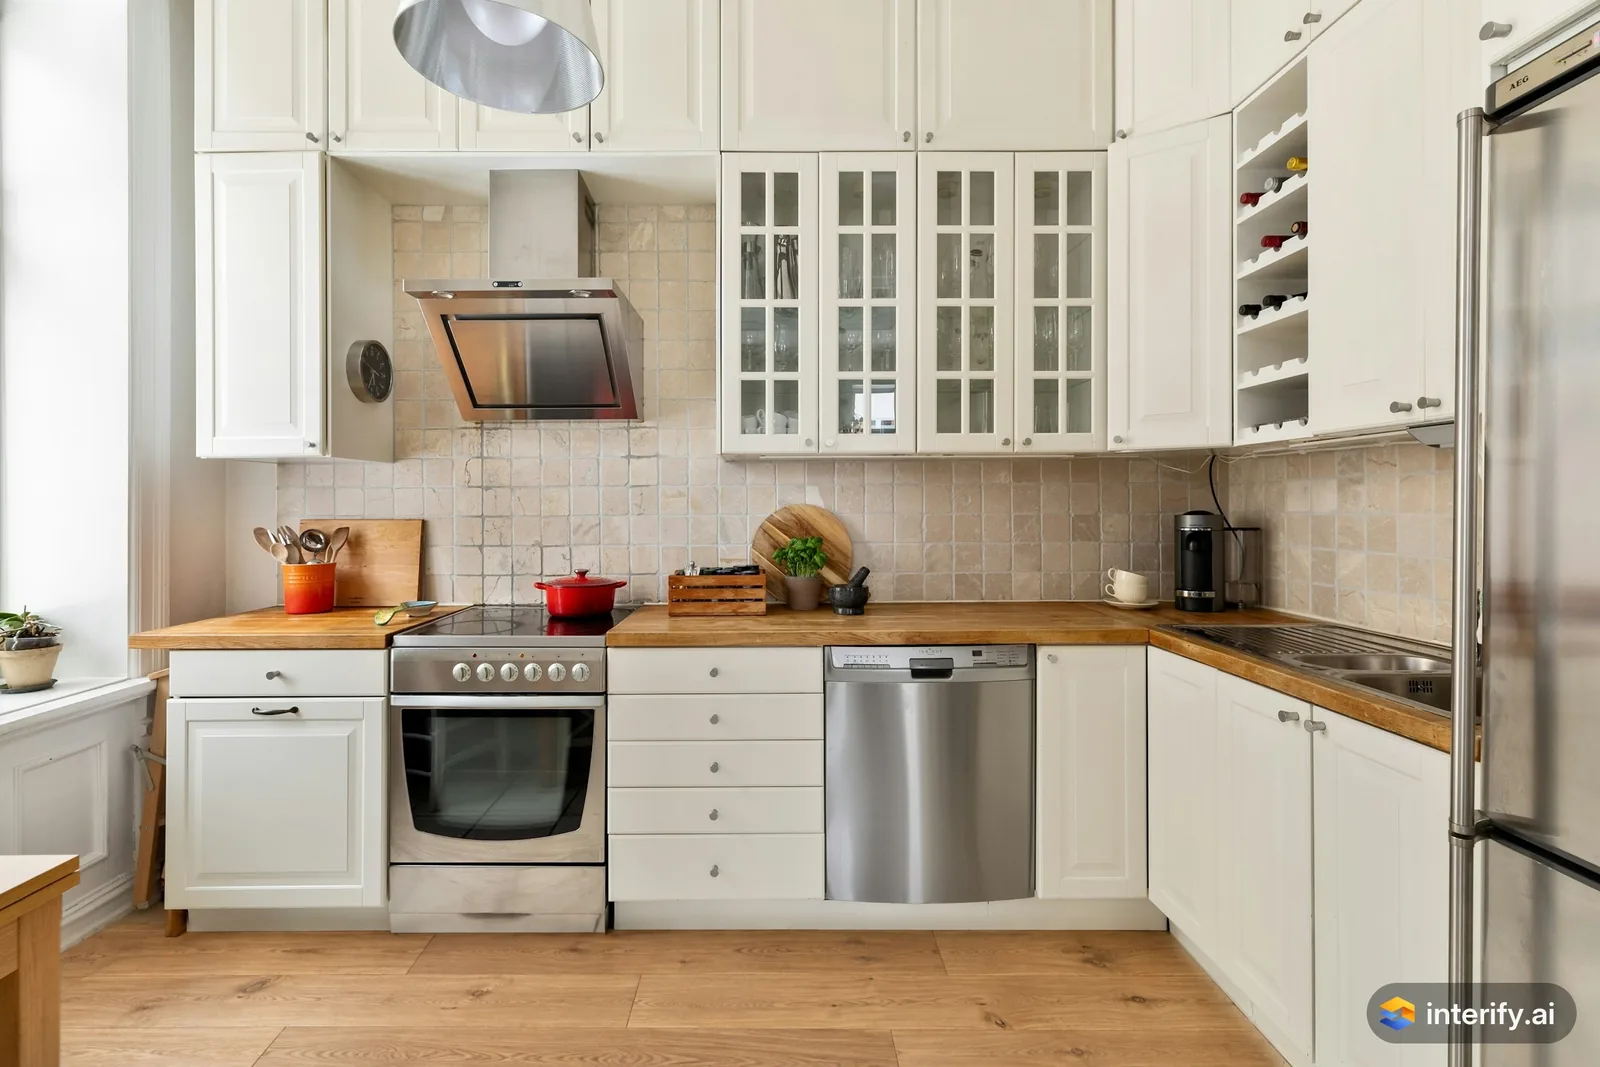
L-shaped kitchen: oak plank floor
Kitchen
- Warm oak plank floor
Made with Interify 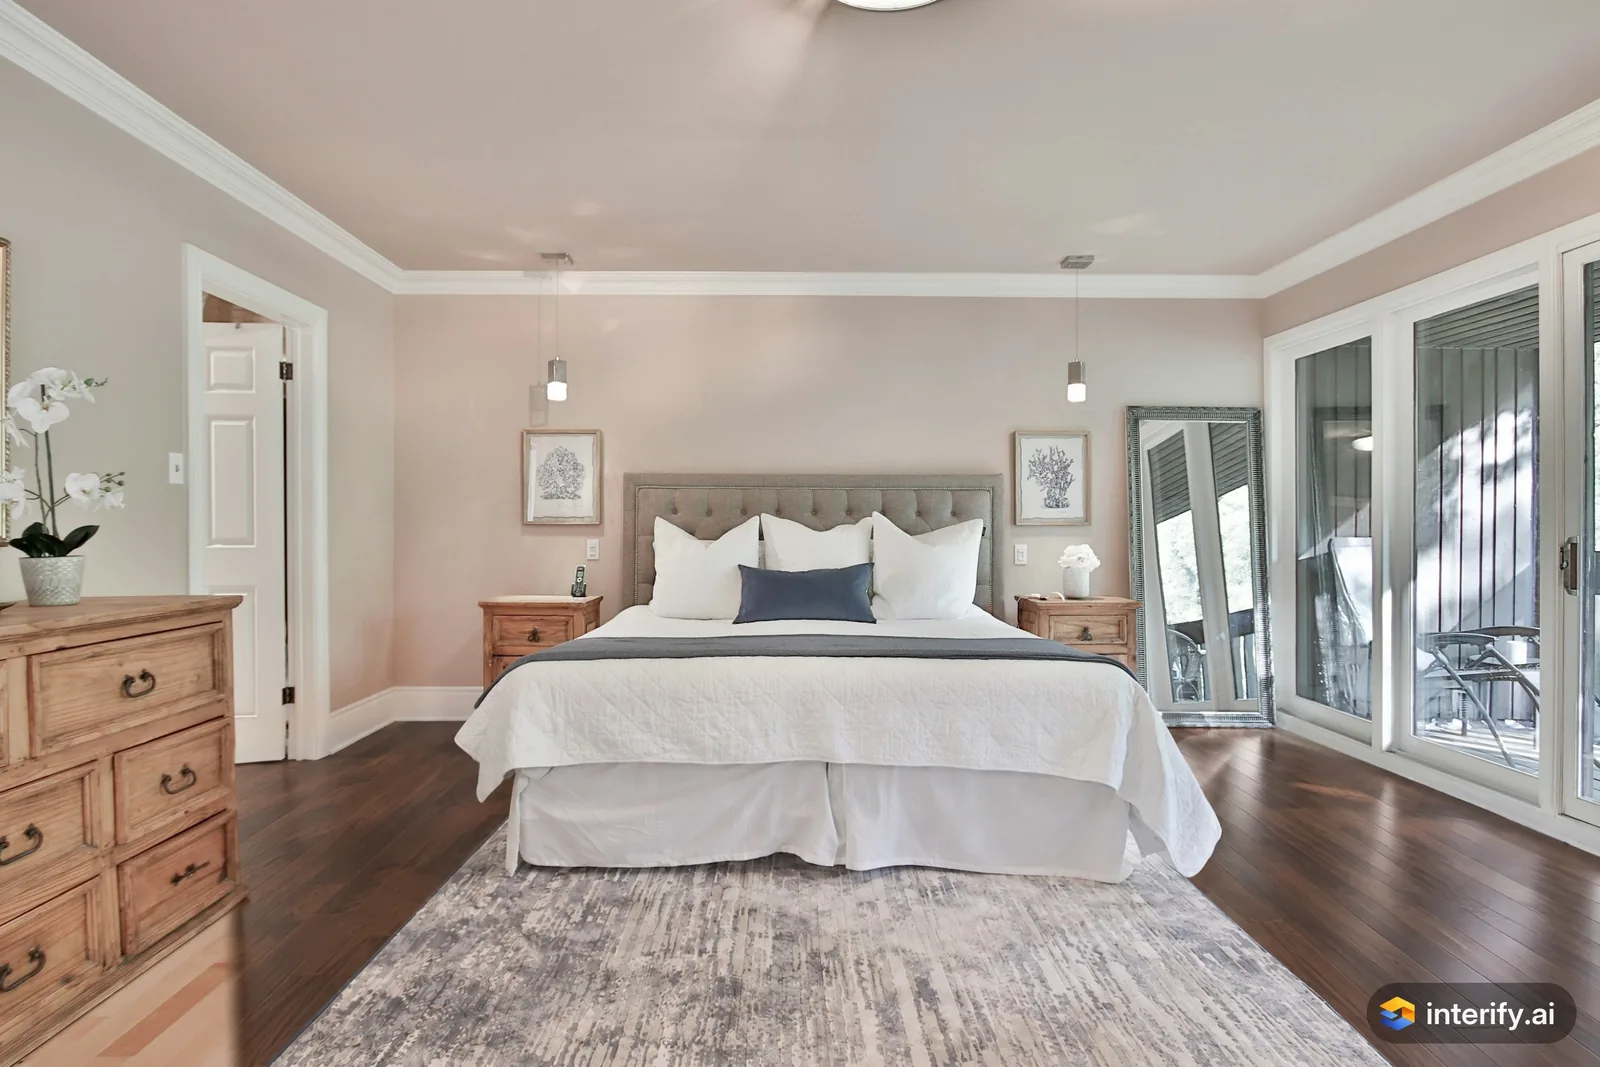
Bedroom: dark walnut floor
Bedroom
- Dark walnut wood floor, keep the rug
Made with Interify 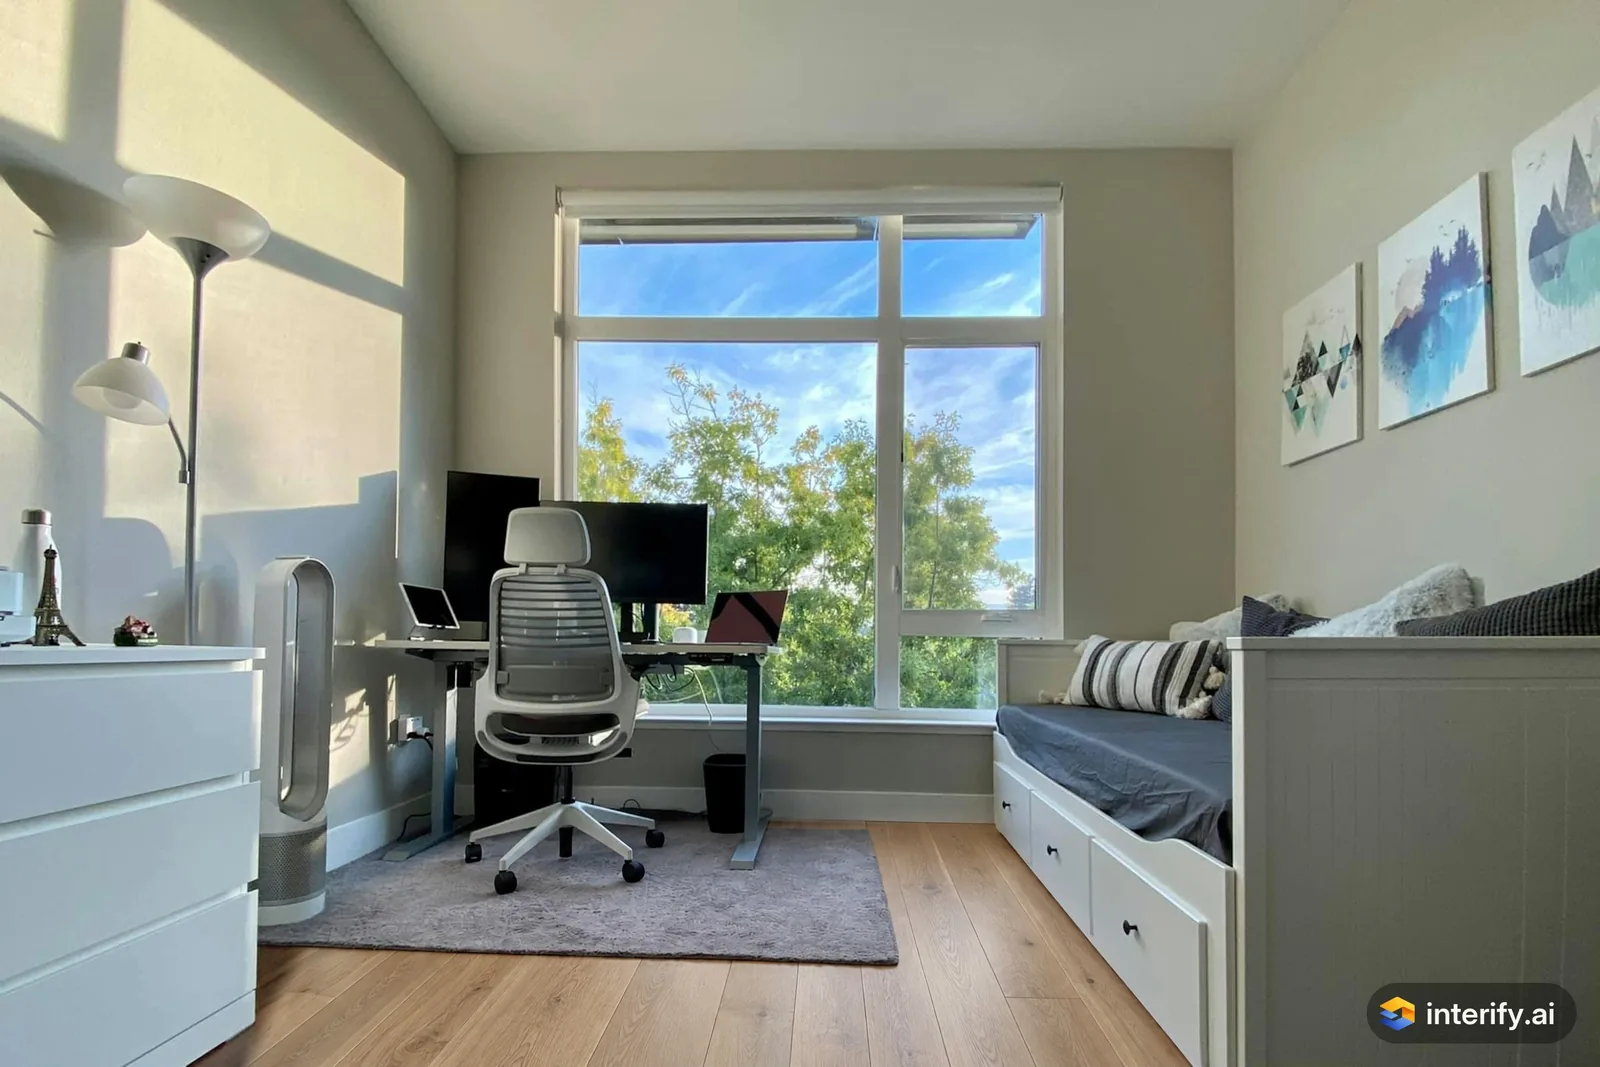
Home office: light oak floor
Home office
- Light oak wood floor, keep the rug
Made with Interify 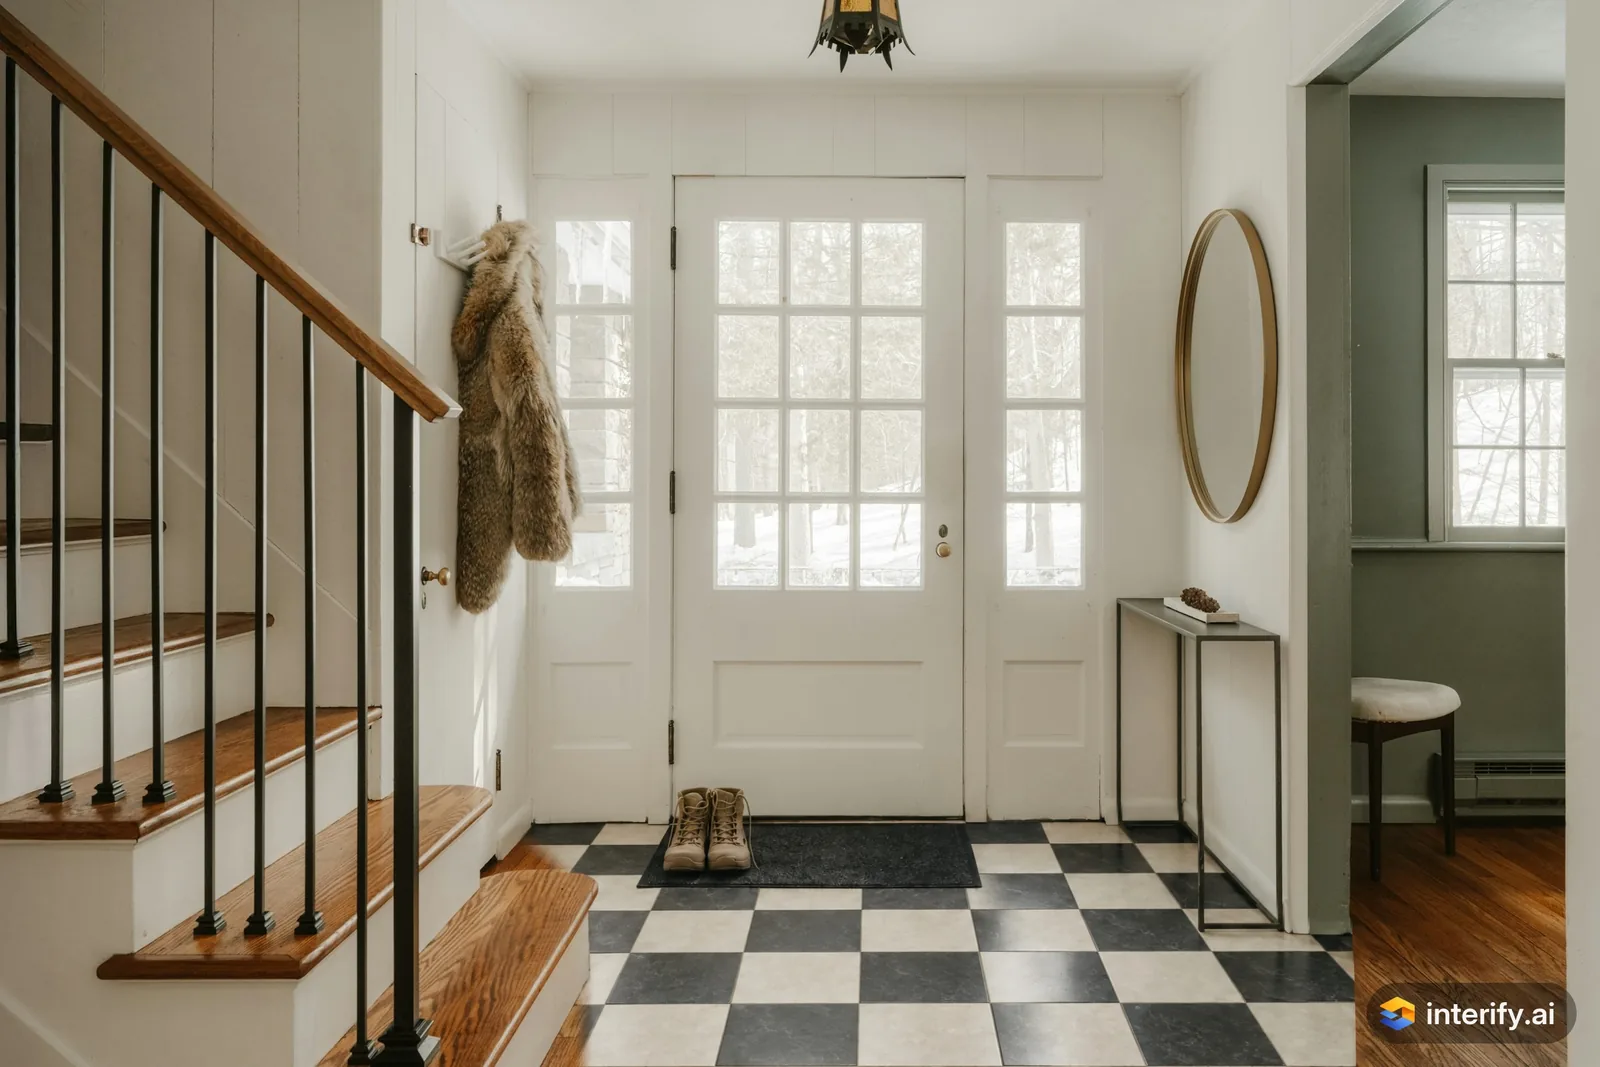
Entryway: checkerboard tile floor
Entryway
- Black and white checkerboard tile floor
Made with Interify
Common questions
Can I see new floors in my own room photo?
Yes. Mark the floor, set the action to Replace material and describe the material, tone, plank size, finish and direction. Without a style, the walls and furniture stay as they were.
Can I keep my furniture in the preview?
Yes. Mark only the floor you can see and leave the furniture unmarked. With no style, it stays where it is, on the new floor.
Can I compare two floors?
Yes. Run one version per floor and compare them in the project's history, or share a link so someone else can see both.
Will it tell me how much flooring to buy?
No. Quantities come from measuring, with an allowance for cuts and waste. A preview answers what it will look like.
Read on
- Living roomMark the wall, floor or sofa in a photo of your own living room, say what each should become, and get a photorealistic preview of the room.
- EntrywaySee entryway and hallway ideas in a photo of your own entry: mark the walls, floor or storage, describe the change and compare the versions.
- Paint colorsA paint color visualizer that uses your own photo: mark the wall and name the color, and with no style the trim and furniture stay as they were.
- FurnitureSee furniture in your own room before you buy: mark where a piece goes, describe it or attach a photo, and judge the scale against your real room.
- ContractorsAgree on the look with a client before work starts: preview the change on their own photo. A preview is not a quote, a measurement or a drawing.
- How it worksThe whole walkthrough, from the photo to the share link.
See it in your own room
The sample room needs no account. Your own photo starts with 3 credits free and no card.